Create a Memphis Design Mural for Under £10.

Prints produced by Eclectic Collage
When I designed my little girl Skye’s Nursery before she was born, I wanted to design something that could be updated easily. With my first child Mylo, I made his room quite simple as it allowed us to adapt the room quite easily, so we did the same with Skye’s room.
We didn’t add any typical “babyish” wallpaper as they grow up so quickly, so we kept the walls plain. In the case of Skye we made them white. An eighties child myself, I love Memphis design and all the patterns that go with it. Memories of the Fresh Prince of Belair and Saved By the Bell, inspired myself and my husband to create some Memphis Art prints which we put into her room and these informed the basis of the design for the initial nursery.

Graphic Images produced by Eclectic Collage
We loved the pastel colour palette and began by creating some inspiration in Pinterest. Take a look below.


Taking some of the shapes and patterns from the pinterest boards, I didn’t want the mural to be complicated or take a long time. So I just kept the pattern to random sizes of triangles in the corner of the room. Here is how I did it.
The tools you will need:
Frog Tape
Pencil
4 pots of tester paint – (I got mine from B&Q and they were only £1.50 each) I had 4 tester colours and used regular black acrylic for the more bold patterns.
Paint Brush
Dust Sheets to protect your flooring
Sketch book/piece of paper

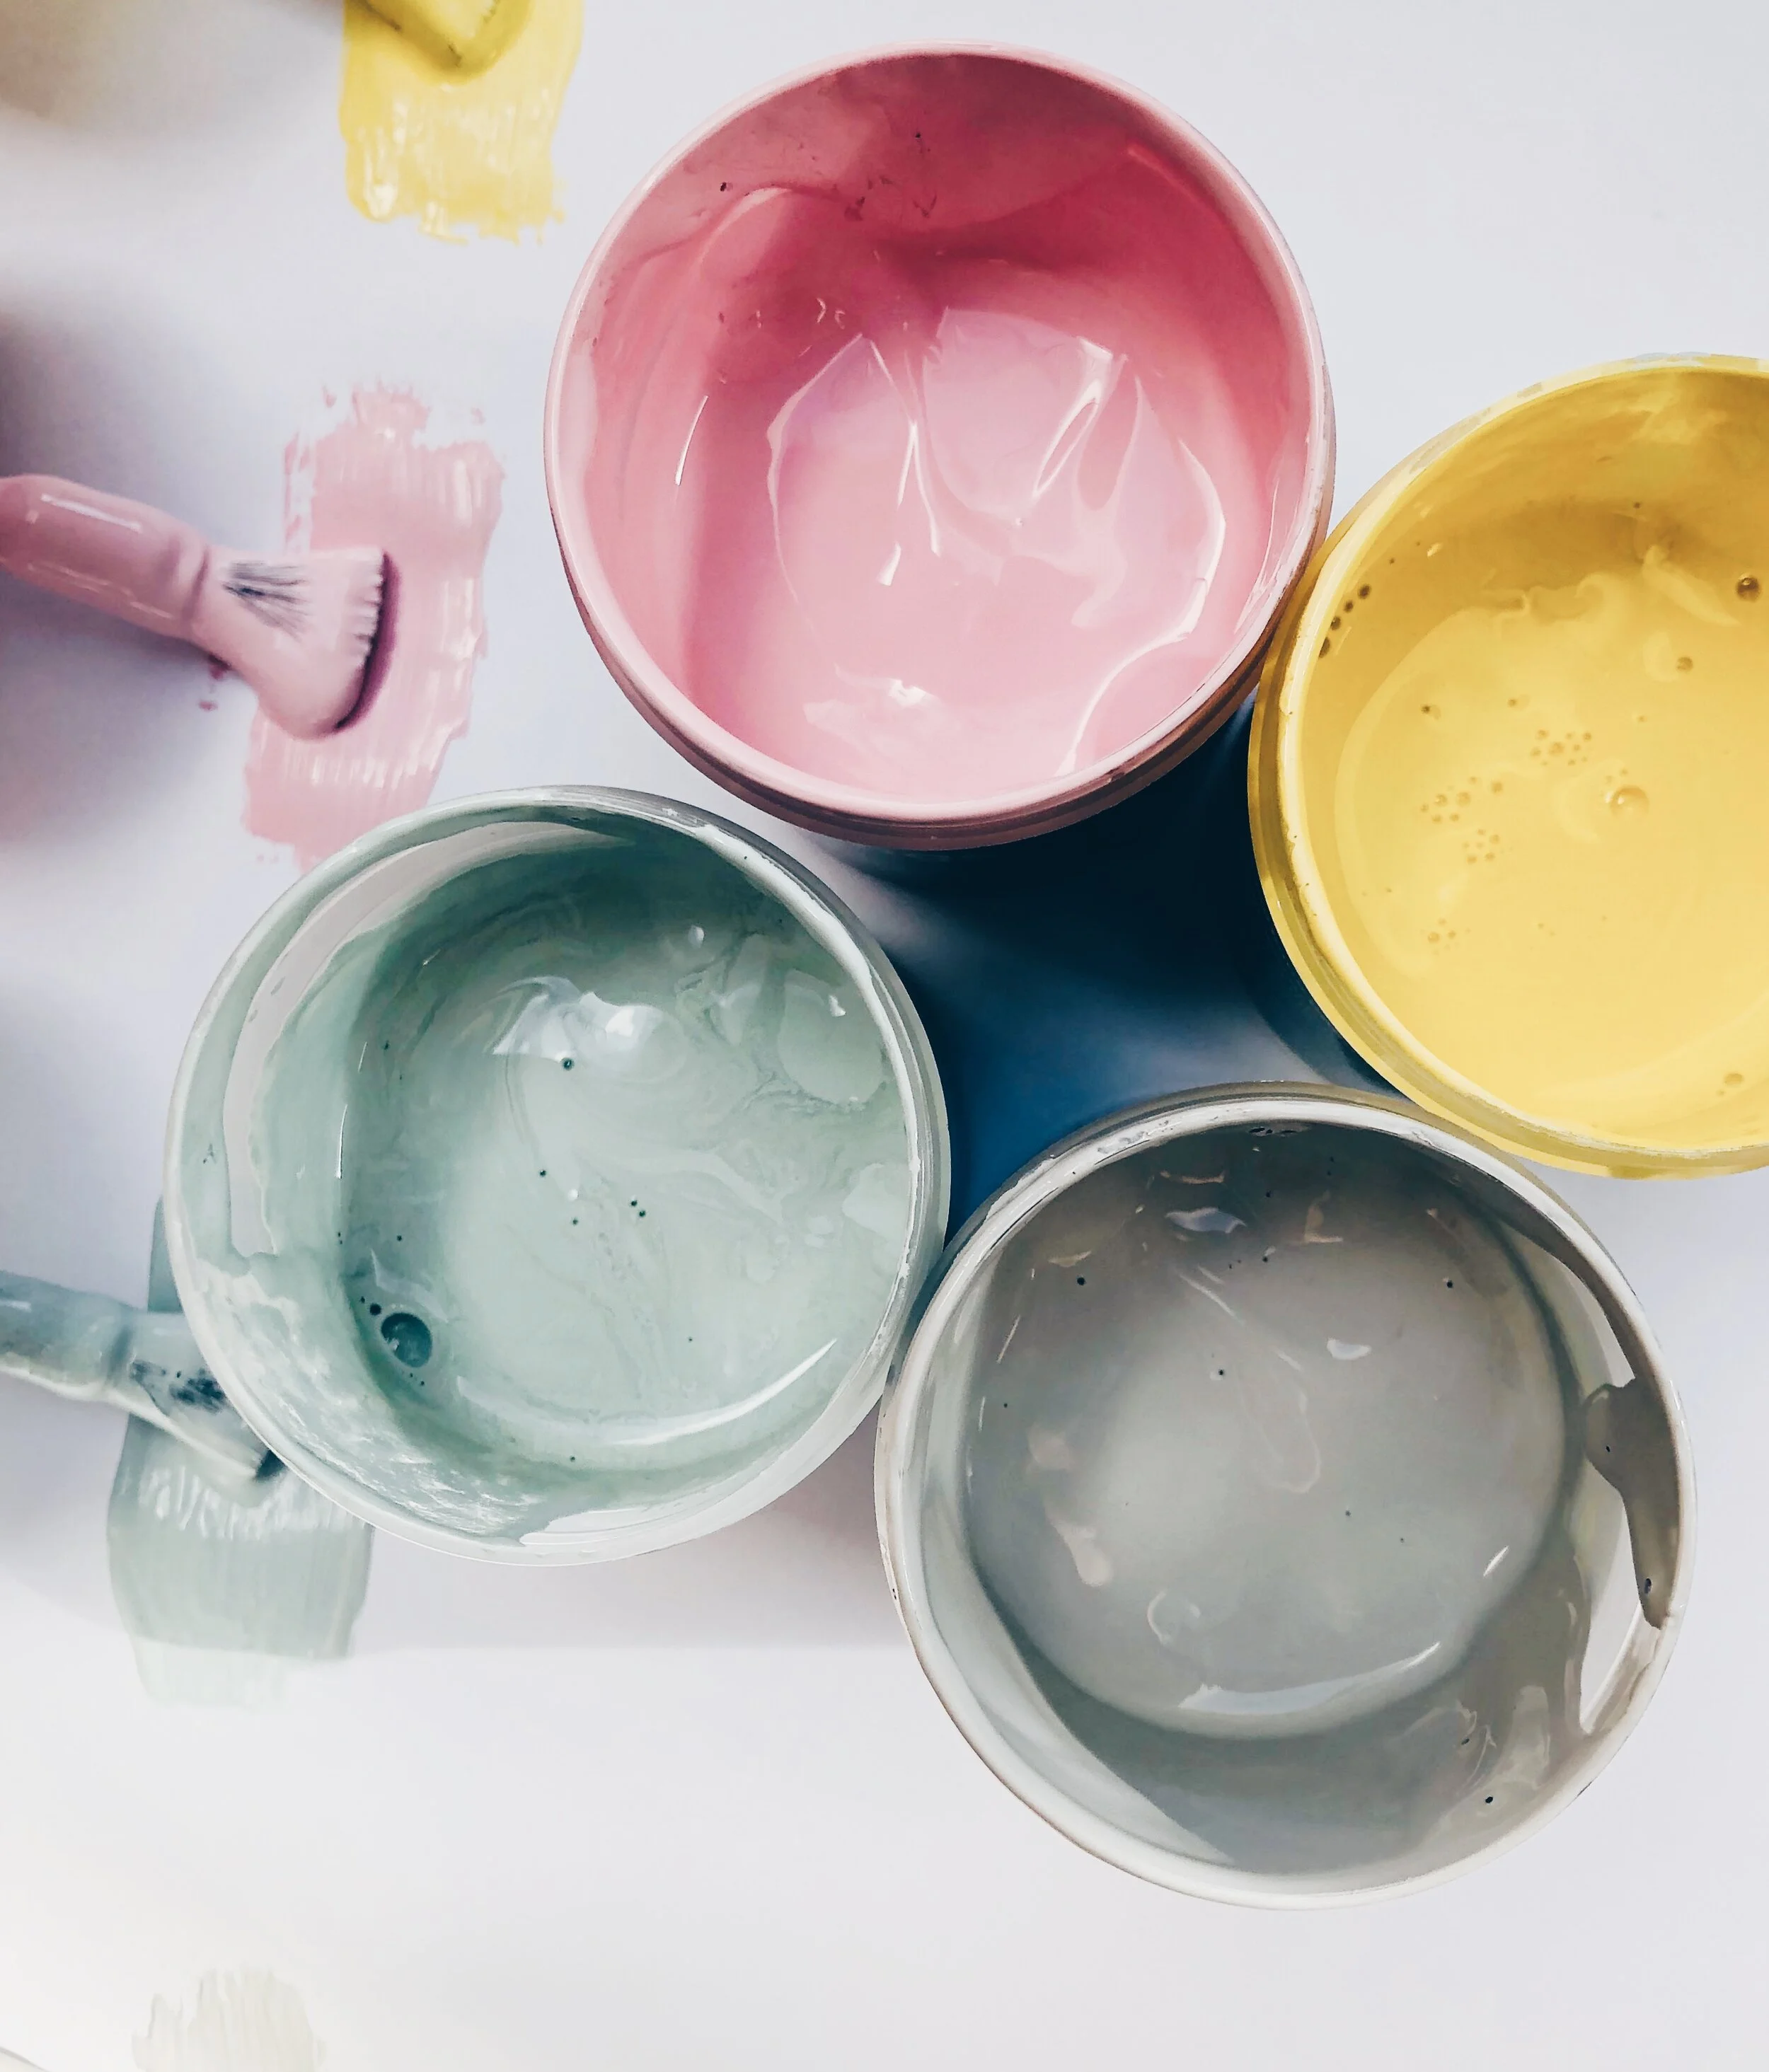
Tester pots bought from B & Q - £1.50 each
Now remember, when I did this, I wanted to have fun with it at the same time. I kept telling myself that the worst thing that could happen was that I would make a mistake – in that case all I had to do was to paint over it! No big deal.
I decided to do my mural in a corner of the room to brighten it up and create a focal point for where Skyes toys and reading area would be. As her room is quite small I wanted to keep the colour choice light. A pastel pink, yellow, mint and grey with a small touch of black to give that Memphis edge.
IMPORTANT THING TO REMEMBER BEFORE STARTING:
Before you begin you may want to have a play with the patterns you have researched and draw out some combinations of patterns. Although I ended up going with the flow and just created it as I went along, you might want to draw it out before hand. Just make sure you leave some of your triangles blank for you add in any strong black and white patterns.
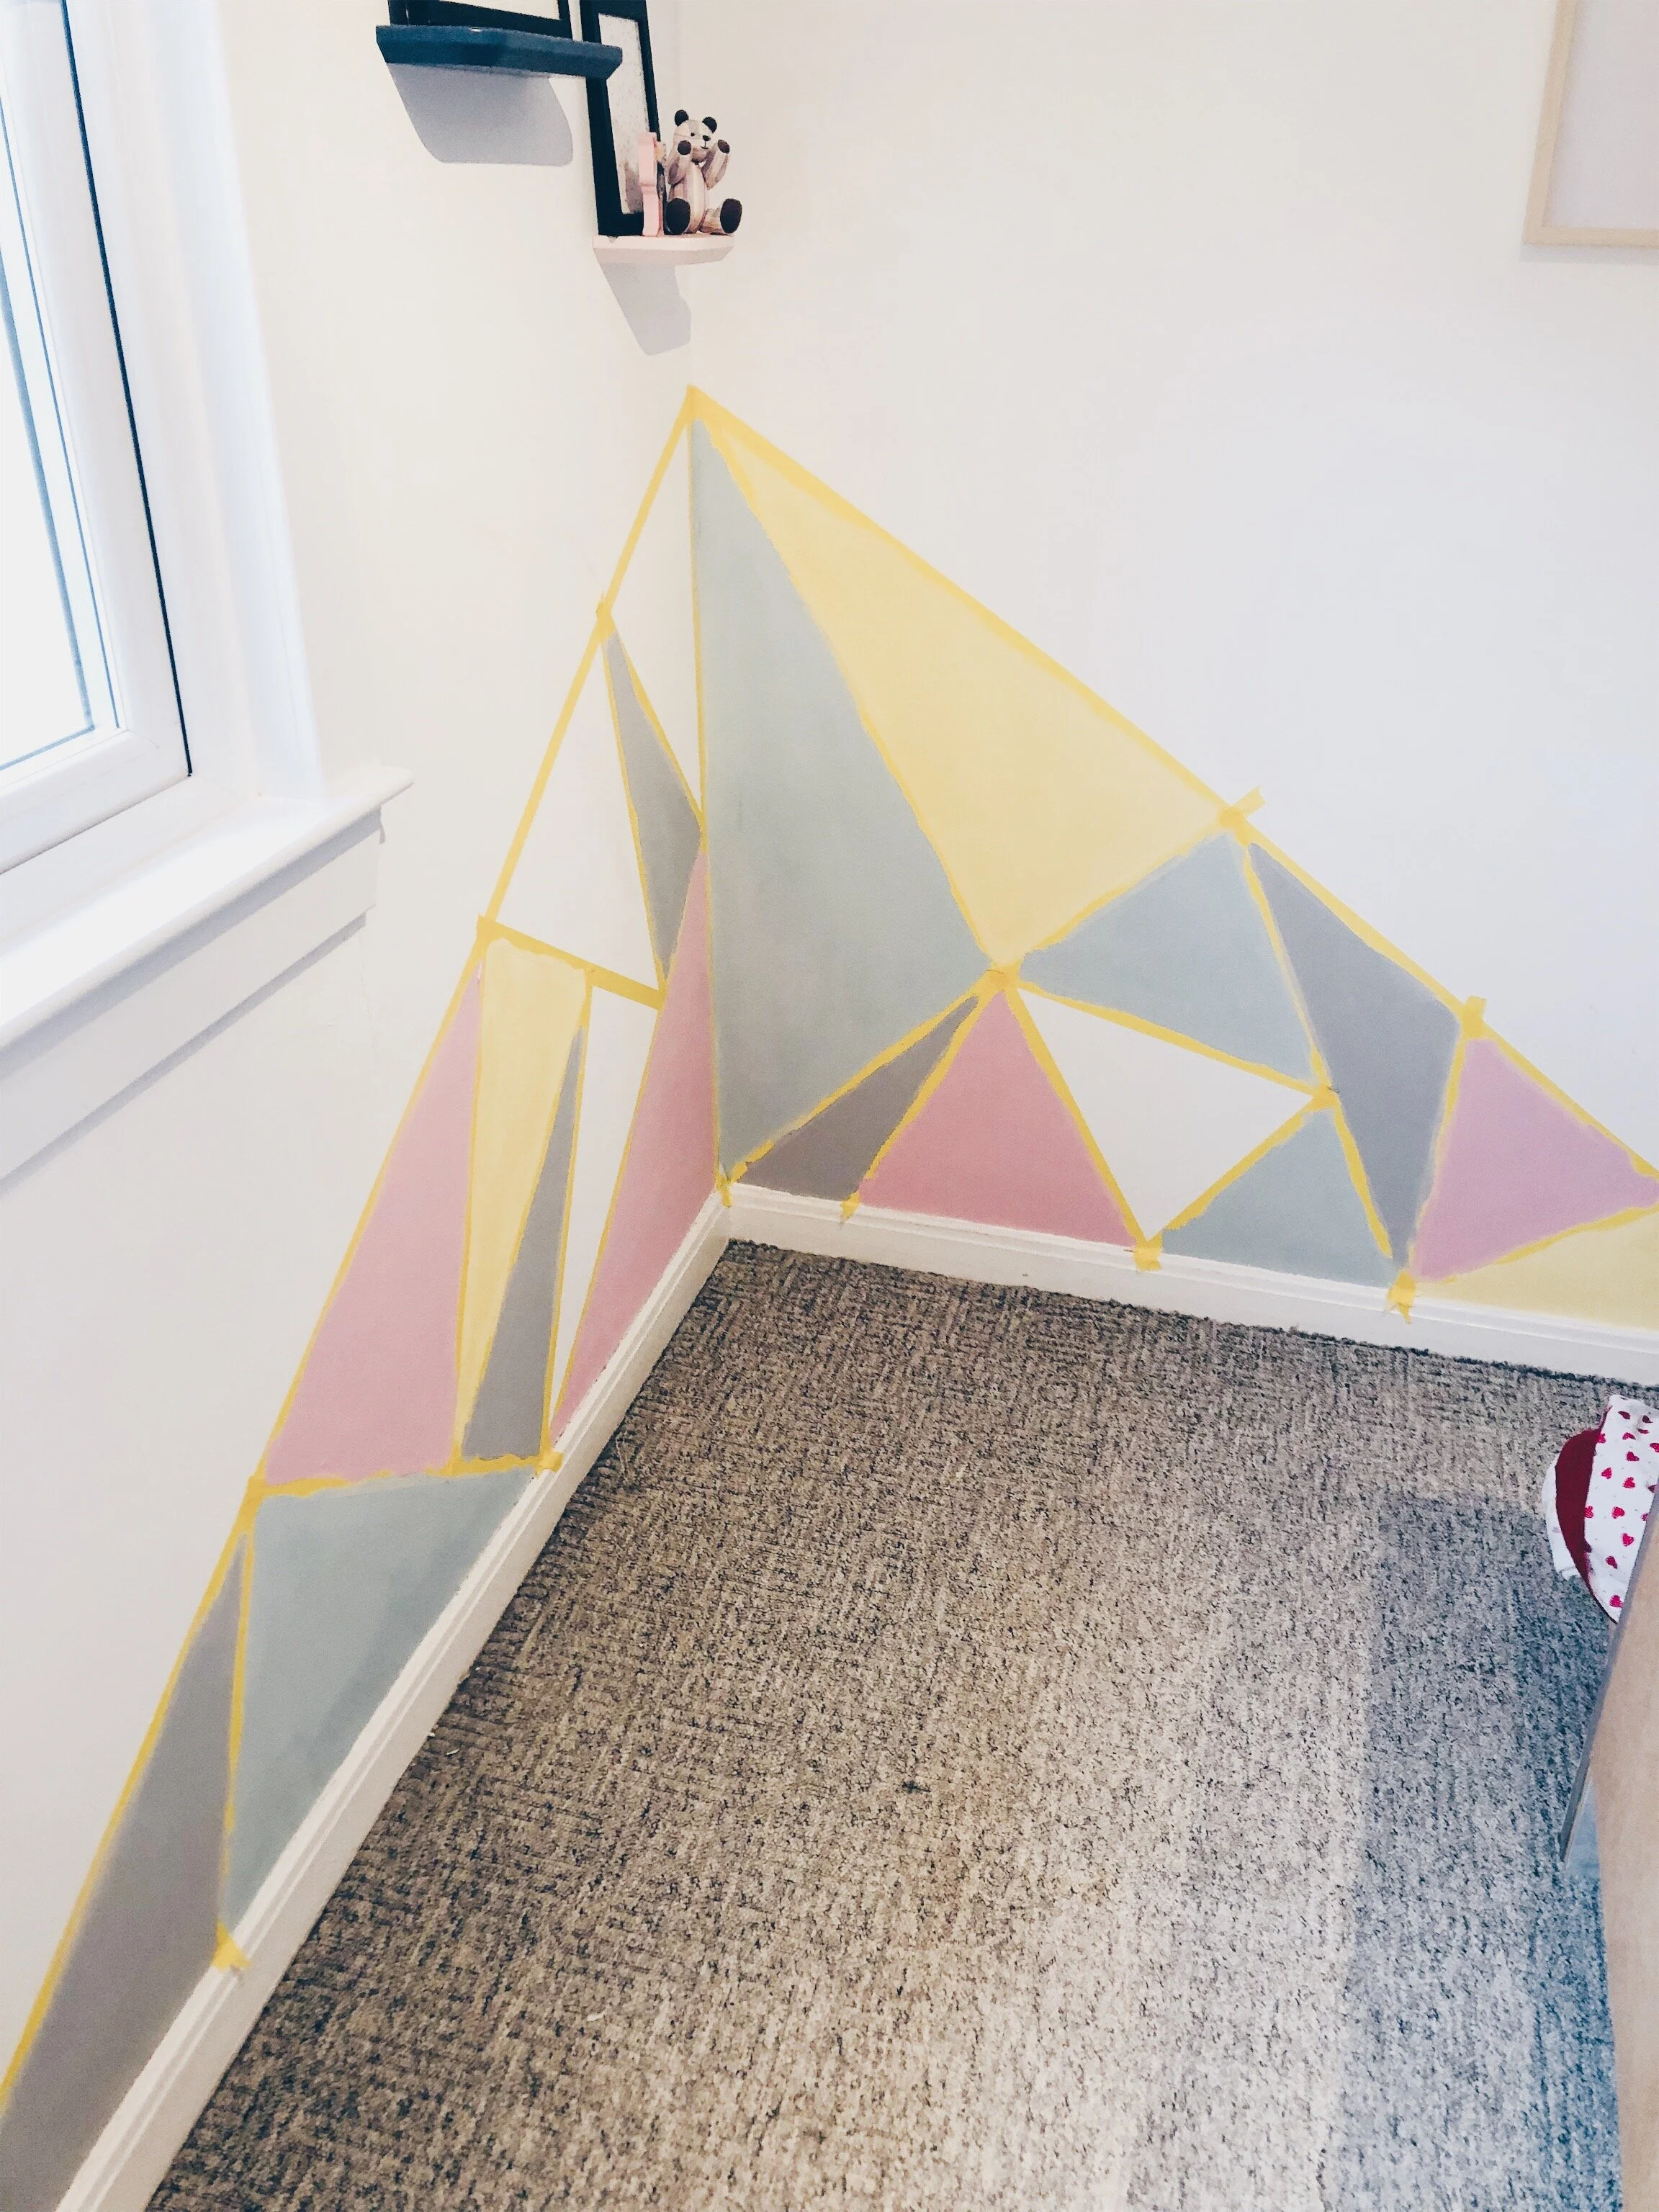
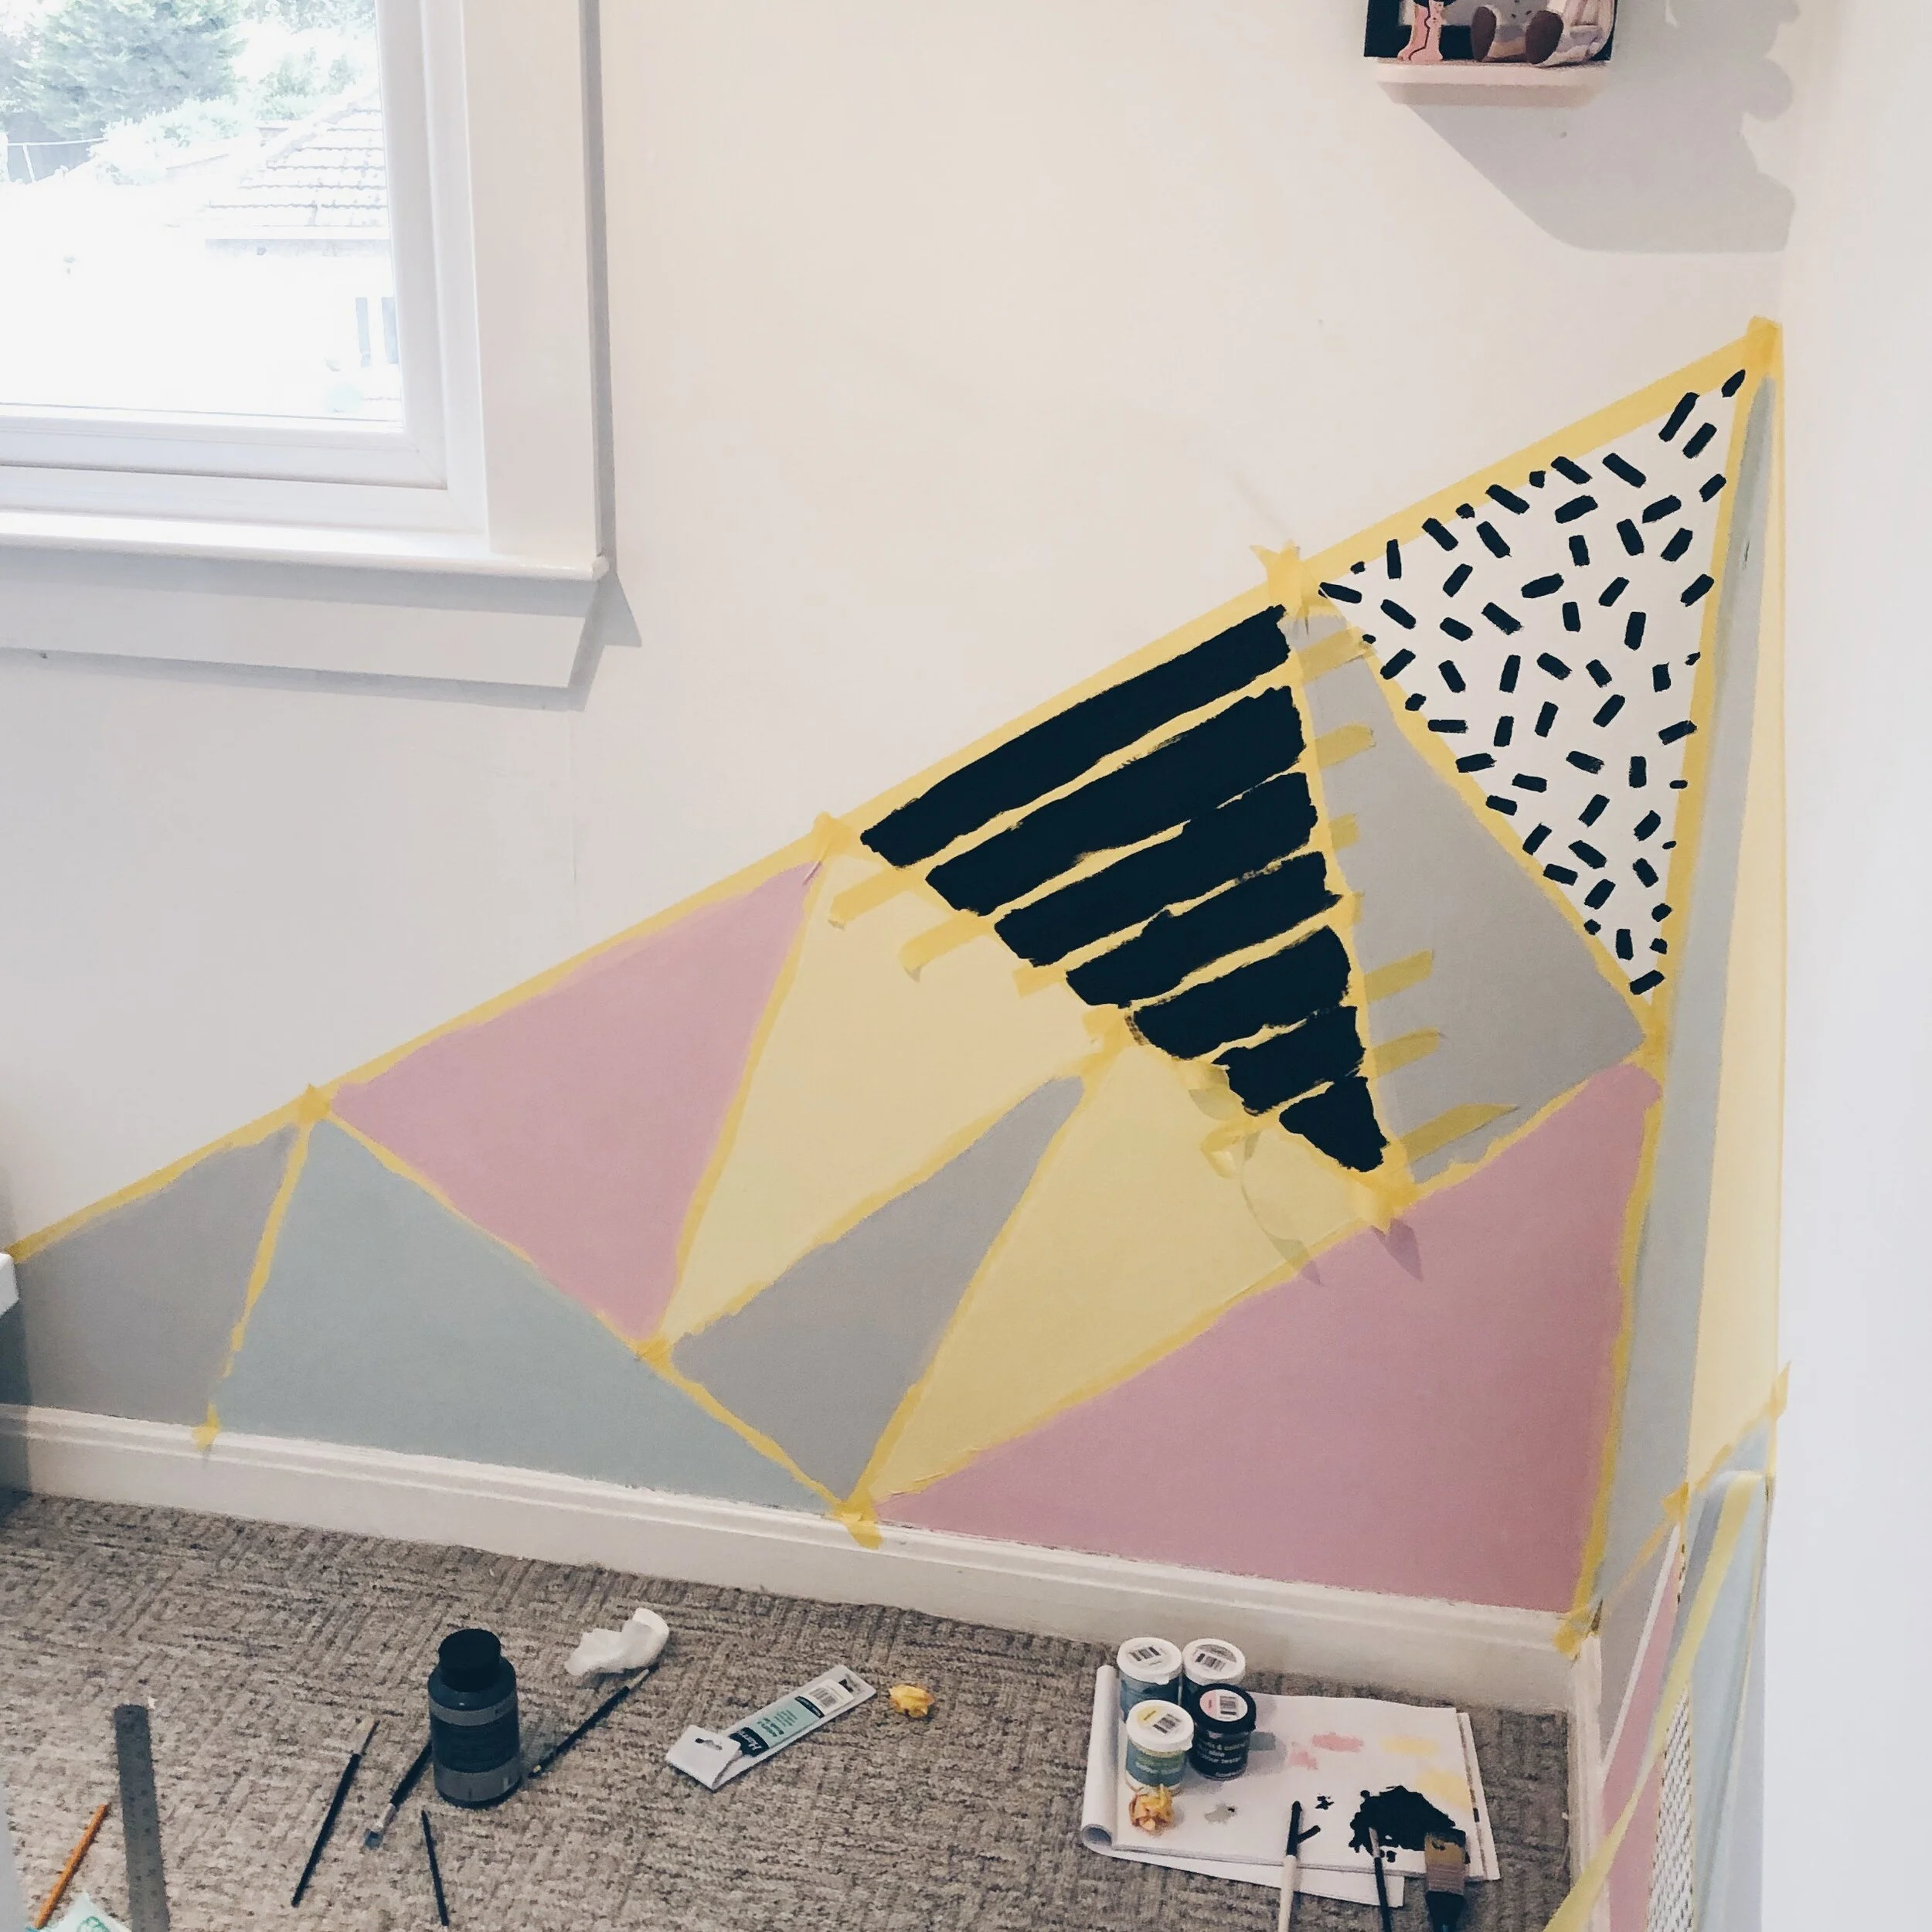
Step 1: OK, so all you have to do is be confident and decide how high you want to take the mural and over what you space you want to reach it Measure and mark the points with a pencil and then join up the points with frog tape. Make a large triangle.
Step 2: Once you have done this, begin to make smaller triangles with the large triangle. Don’t worry about size. The more random the better. You should get to something like this.

For Step 2
Step 3: Once you are happy with the layout of your triangles start to think about where you want your colours to go and try not to have any of the same colour next to each other. You need to also think about where you want your bold patterns to go ie black patterns. You may find it helpful to draw a small sketch to give yourself an idea of how it wouid look if you don’t find it helpful as detailed at the start.
From there on just have some fun and begin to paint your triangles as below.
For Step 3
Step 4: Painting some black bold patterns. There are a number of patterns you can choose for this. In my case I decided to keep it simple and just use the frog tape. I measured out equal distance between the lines and painted them with black acrylic. I then did the other triangle by hand and just did black strokes with the brush (I just did this by eye).
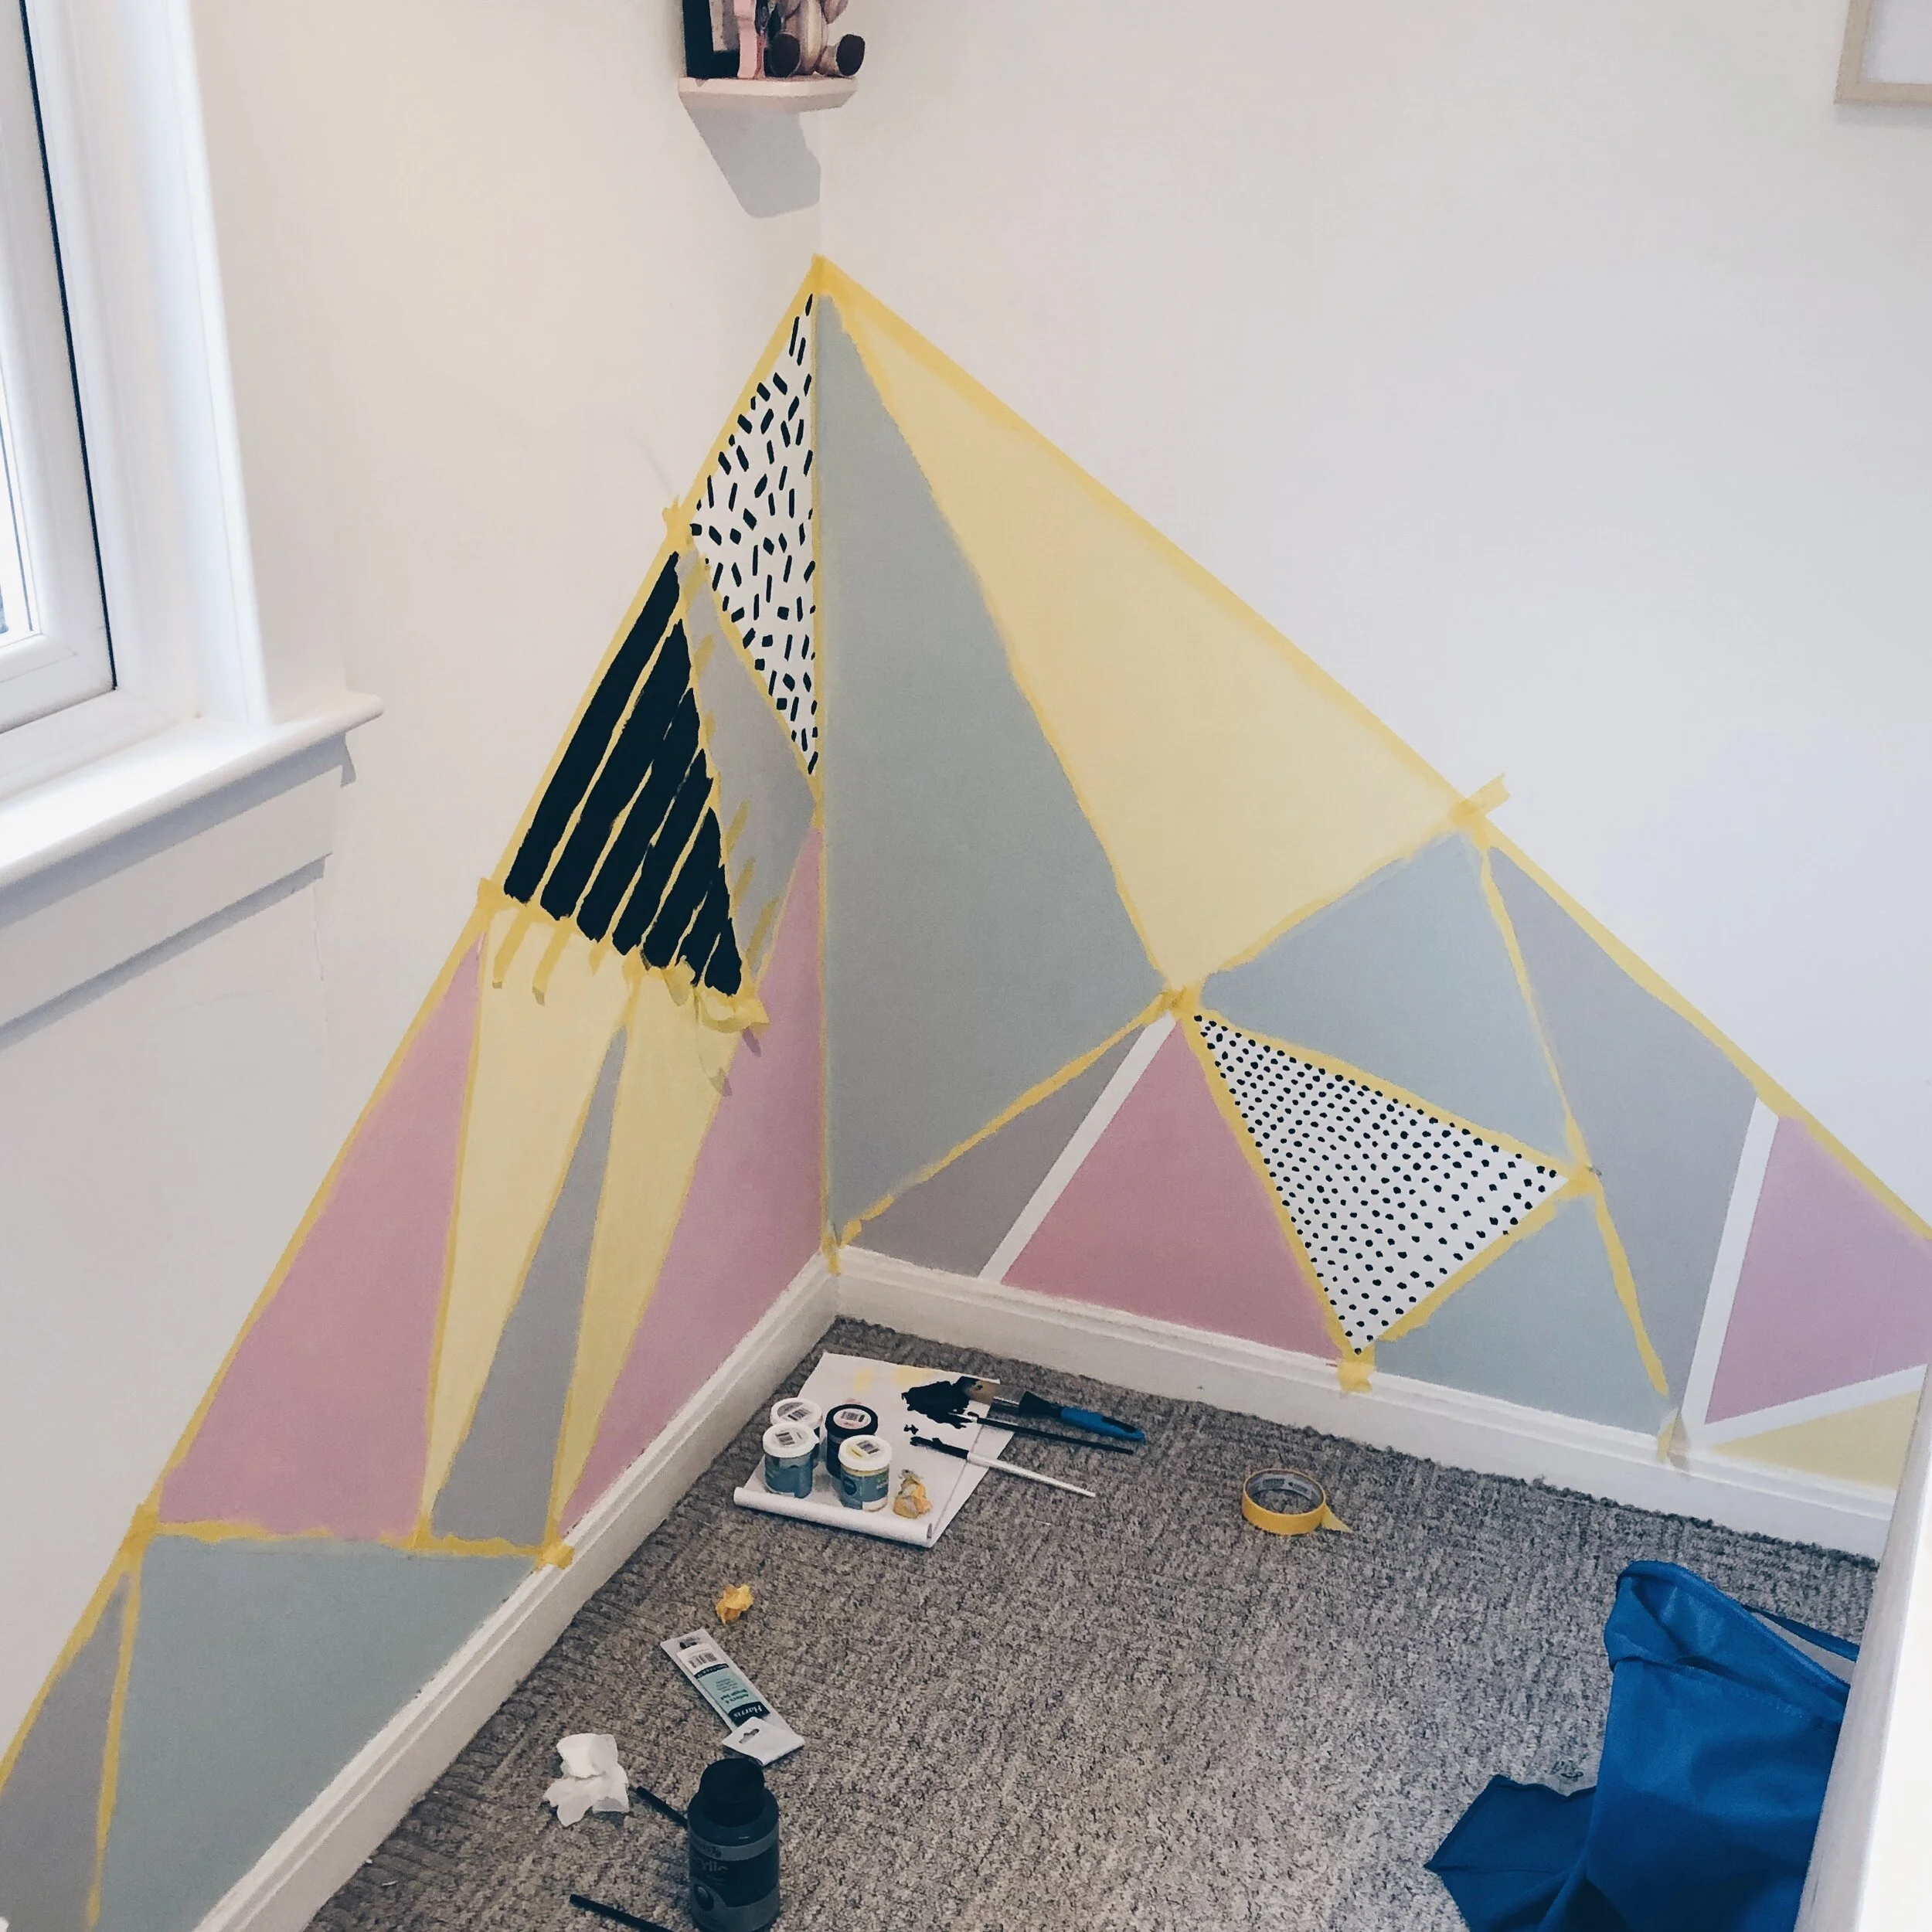
For Step 4
Leave all the paint to dry and check to see if you need to add another coat or not. If you ensure when you paint it on initially quite thickly then you should be fine.
Step 5: Once the paint is dry begin to remove the frog tape and your mural will be revealed.


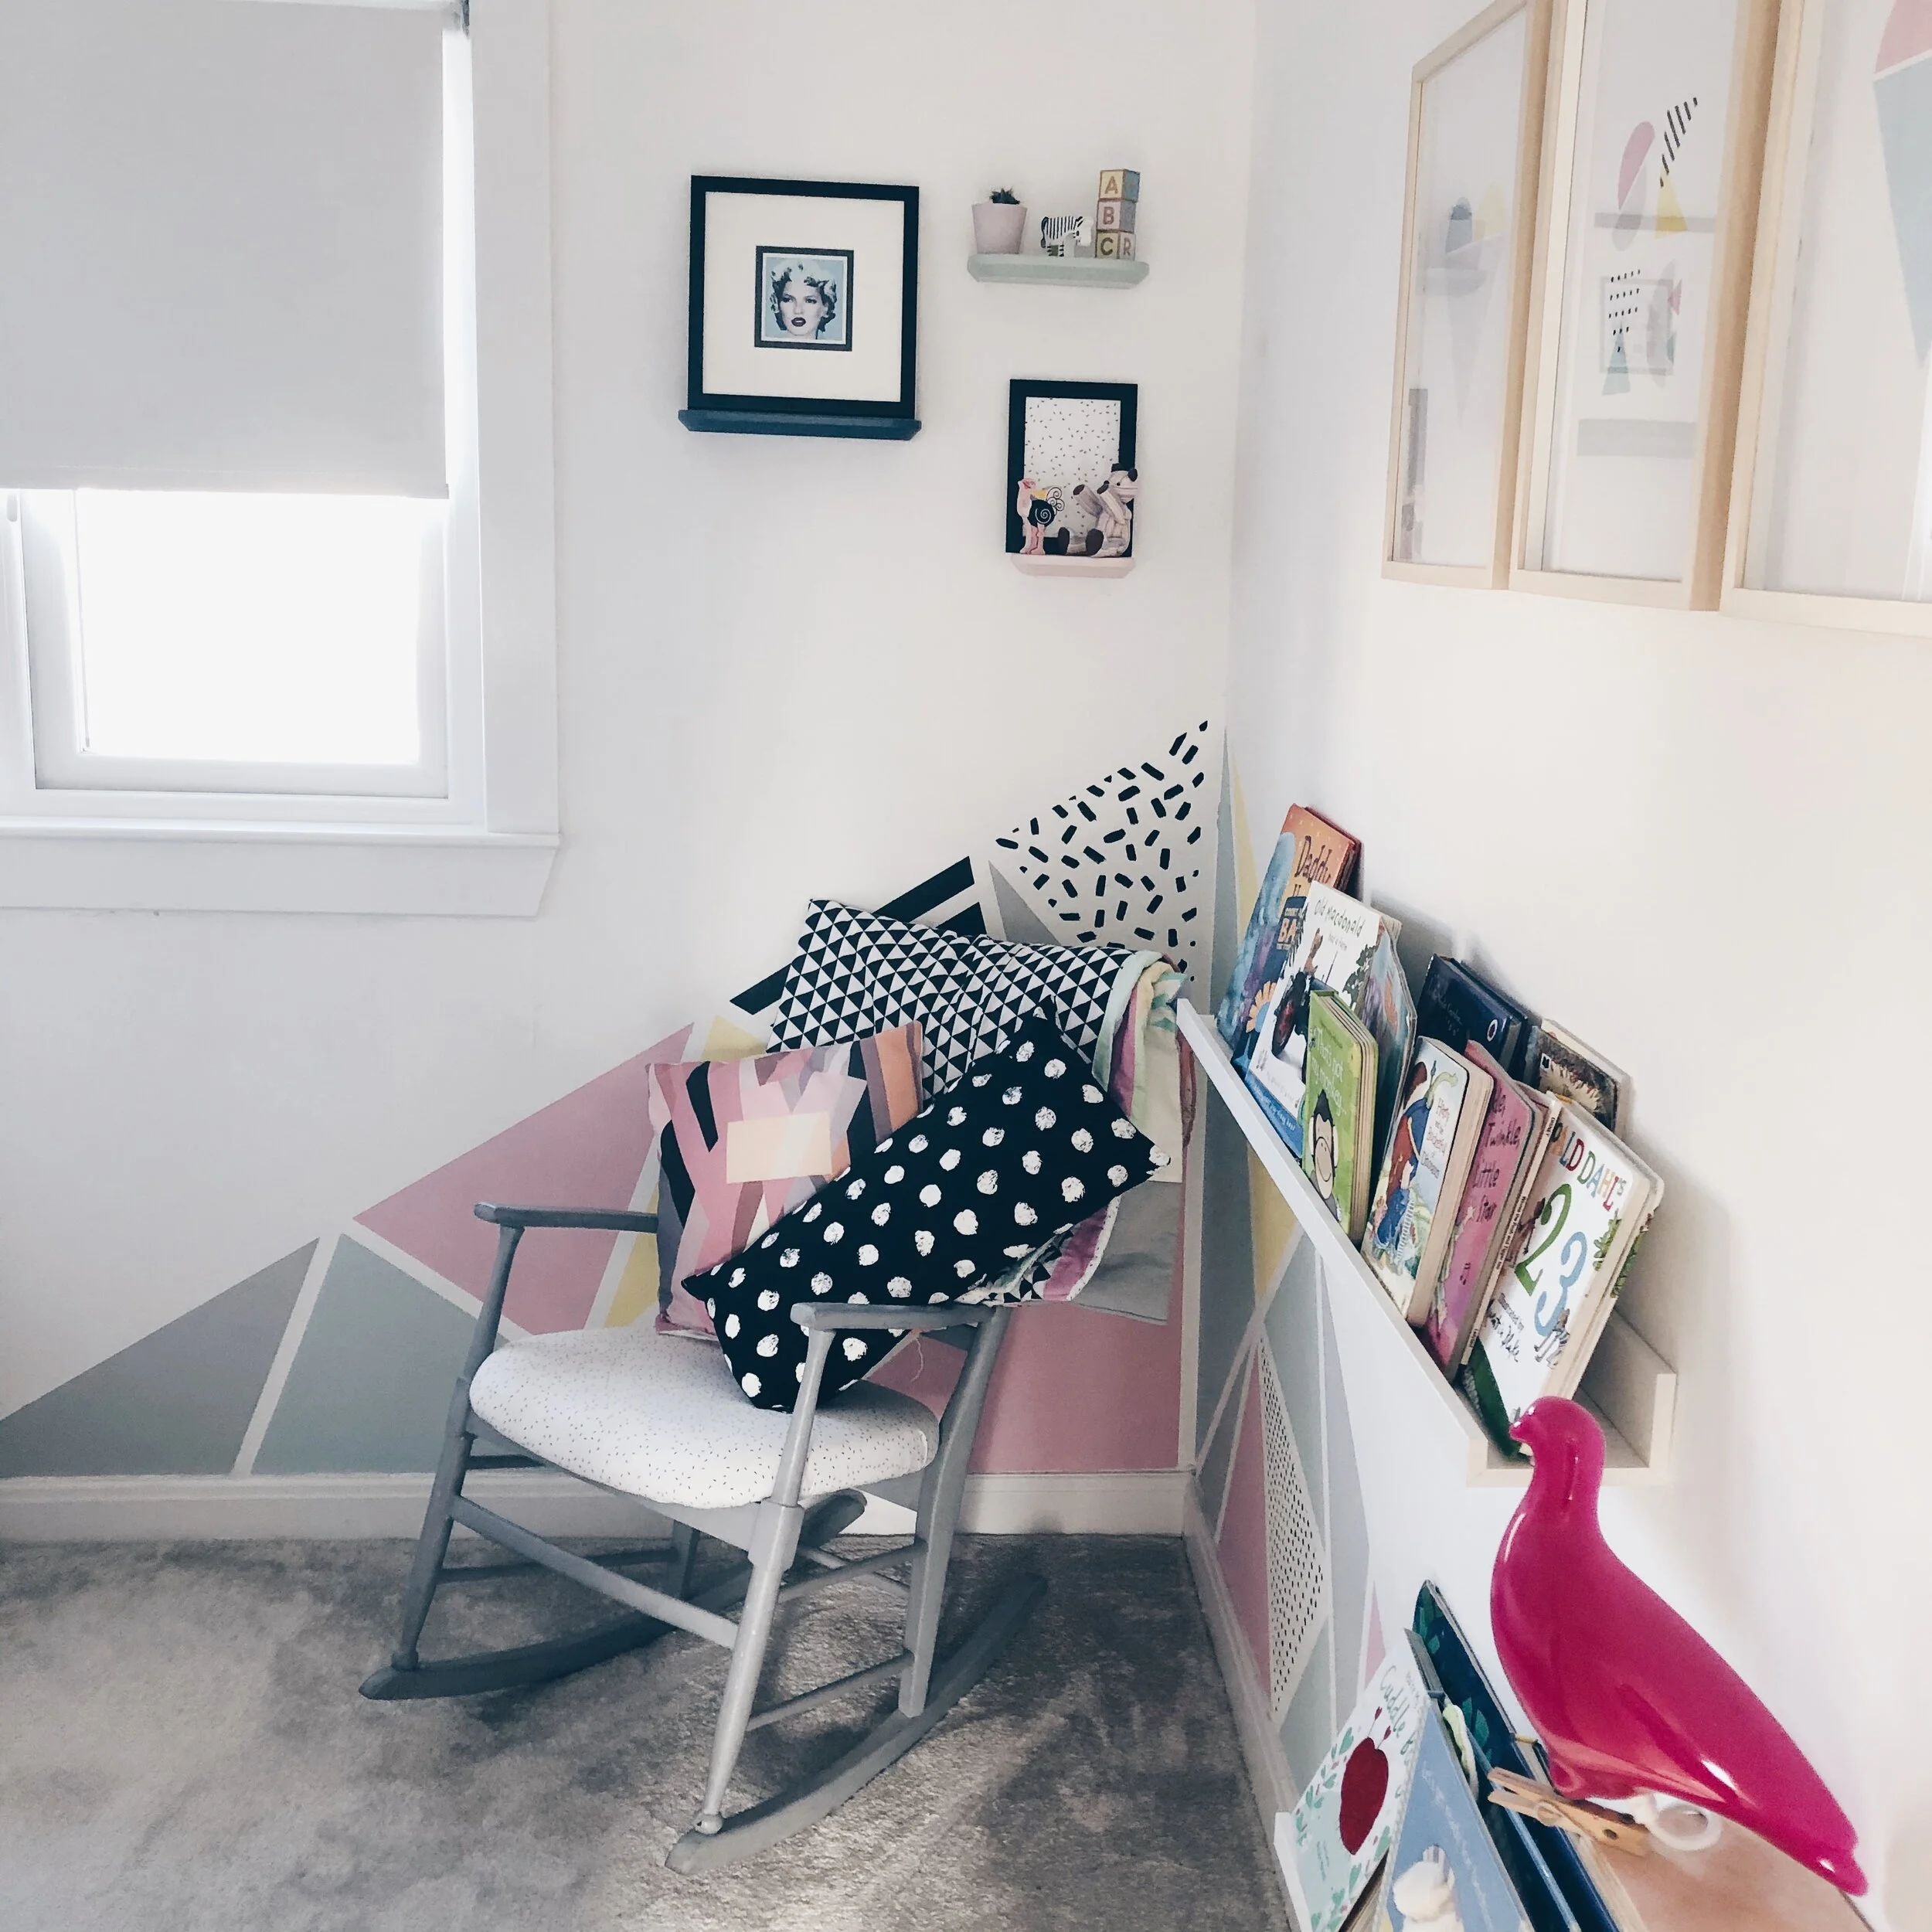

I was really happy with how it turned out! We just added in some radiator shelves from Ikea to put all her books on.
I hope you enjoyed this and let me know if it was helpful.
Happy mural painting!